Windows (UWP) apps use animations to enhance the user interface or to make it more attractive without annoying your users. One way you can do this is to apply animated transitions to UI so that when something enters or leaves the screen or otherwise changes, the animation draws the attention of the user to the change. As you can read in the documentation (Animation overview) you can use the reposition animations (RepositionThemeTransition) to move an element into a new position. For example changing the position (Row/Column) of an item in a Grid.
RepositionThemeTransition
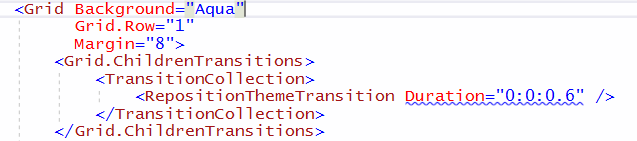
The next XAML snippet has a Grid with two columns and two rows. The red Rectangle is shown in the top left corner (column 0 and row 0). The Grid has a RepositionThemeTransition in the ChildrenTransitions property. The Button is used to reposition the Rectangle.
<Button Content="Reposition Left"
        Click="ButtonLeft_Click" />

<Grid Background="Aqua"
      Grid.Row="1"
      Margin="8">
    <Grid.ChildrenTransitions>
        <TransitionCollection>
            <RepositionThemeTransition />
        </TransitionCollection>
    </Grid.ChildrenTransitions>
    <Grid.ColumnDefinitions>
        <ColumnDefinition Width="1*" />
        <ColumnDefinition Width="1*" />
    </Grid.ColumnDefinitions>
    <Grid.RowDefinitions>
        <RowDefinition Height="1*" />
        <RowDefinition Height="1*" />
    </Grid.RowDefinitions>

    <Rectangle x:Name="rectLeft"
               Margin="8"
               Fill="Red" />
</Grid>
In the ButtonLeft_Click method the position of the rectangle changes. From left to right and from top to bottom. This is done by changing the Grid.Row and Grid.Column attached properties.
private void ButtonLeft_Click(object sender, RoutedEventArgs e) {
    Reposition(rectLeft);
}

private void Reposition(FrameworkElement element) {
    int row = Grid.GetRow(element);
    int col = Grid.GetColumn(element);
    if (col == 0) {
        col++;
    } else {
        if (row == 0) {
            row++;
        } else {
            row = 0;
        }
        col = 0;
    }
    Grid.SetRow(element, row);
    Grid.SetColumn(element, col);
}
A RepositionThemeTransition has a property IsStaggeringEnabled that determines whether the transition staggers rendering of multiple items, or renders all items at once. It does not have a Duration or Easing properties. The default duration of 300 milliseconds is sometimes too fast for me.
Implicit Animations
To solve my missing Duration property problem I came with the following solution. You can replace the RepositionThemeTransition with an Implicit Animations. Implicit Animations were added in the Windows 10 Anniversary Update (Build 10586, Nov 2016) as part of the Composition API.
The following XAML snippet has a button which also changes the position (Grid.Row and Grid.Column properties) of a Rectangle in a Grid. The ComboBox is used to select the Duration of the animation. There is no RepostionThemeTransition in this Grid.
<Button Content="Reposition Right"
        Click="ButtonRight_Click"
        Margin="8,8,8,0"
        VerticalAlignment="Bottom"
        Grid.Column="1" />

<ComboBox x:Name="comboBoxDuration"
            SelectionChanged="comboBoxDuration_SelectionChanged"
            Header="Duration"
            Margin="8,8,8,0"
            SelectedIndex="1"
            Grid.Column="1"
            HorizontalAlignment="Right">
    <ComboBoxItem>150</ComboBoxItem>
    <ComboBoxItem>300</ComboBoxItem>
    <ComboBoxItem>600</ComboBoxItem>
    <ComboBoxItem>900</ComboBoxItem>
    <ComboBoxItem>1200</ComboBoxItem>
</ComboBox>

<Grid Background="Aqua"
      Margin="8"
      Grid.Row="1"
      Grid.Column="1">
    <Grid.ColumnDefinitions>
        <ColumnDefinition Width="1*" />
        <ColumnDefinition Width="1*" />
    </Grid.ColumnDefinitions>
    <Grid.RowDefinitions>
        <RowDefinition Height="1*" />
        <RowDefinition Height="1*" />
    </Grid.RowDefinitions>

    <Rectangle x:Name="rectRight"
               Margin="8"
               Fill="Red" />
</Grid>
The real work is done in the InitComposition method which is called from the MainPage_Loaded eventhandler. This method creates the ImplicitAnimation. If you don't know how it works you should read the robmikh blog 'Exploring Implicit Animations'. I used his code but added an easing function (line 48) and a flexible Duration (line 60). The Duration can be selected by the user using the ComboBox. In his sample code he repositioned a self-created SpriteVisual by setting the Offset. My code creates the visual from the Rectangle created in XAML (line 46). I expected that it would only work if you change the Offset of the visual but luckily it also works when you change the Grid.Column or Grid.Row attached properties. It even works when you resize the page.
public sealed partial class MainPage : Page {
    private Compositor _compositor;
    private Visual _visual;
    private Vector3KeyFrameAnimation _offsetAnimation;
    private ScalarKeyFrameAnimation _rotationAnimation;

    public MainPage() {
        this.InitializeComponent();
        this.Loaded += this.MainPage_Loaded;
        this.Unloaded += this.MainPage_Unloaded;
    }

    private void MainPage_Unloaded(object sender, RoutedEventArgs e) {
        _visual.Dispose();
    }

    private void MainPage_Loaded(object sender, RoutedEventArgs e) {
        // InitComposition in Loaded event so the Size of the Visual is set
        InitComposition(rectRight);
    }

    private void ButtonRight_Click(object sender, RoutedEventArgs e) {
        Reposition(rectRight);
    }

    private void Reposition(FrameworkElement element) {
        int row = Grid.GetRow(element);
        int col = Grid.GetColumn(element);
        if (col == 0) {
            col++;
        } else {
            if (row == 0) {
                row++;
            } else {
                row = 0;
            }
            col = 0;
        }
        Grid.SetRow(element, row);
        Grid.SetColumn(element, col);
    }

    private void InitComposition(FrameworkElement element) {
        if (ApiInformation.IsTypePresent("Windows.UI.Xaml.Hosting.ElementCompositionPreview")) {

            _compositor = ElementCompositionPreview.GetElementVisual(this).Compositor;

            var easing = _compositor.CreateCubicBezierEasingFunction(
                    new Vector2(0.3f, 0.3f),
                    new Vector2(0.0f, 1.0f)
            );
            //var easing = _compositor.CreateLinearEasingFunction();

            _visual = ElementCompositionPreview.GetElementVisual(element);

            // Create animation
            _offsetAnimation = _compositor.CreateVector3KeyFrameAnimation();
            _offsetAnimation.Target = nameof(Visual.Offset);
            _offsetAnimation.InsertExpressionKeyFrame(1.0f, "this.FinalValue", easing);
            _offsetAnimation.Duration = TimeSpan.FromMilliseconds(SelectedDuration);

            // Set trigger + assign animation
            var implicitAnimations = _compositor.CreateImplicitAnimationCollection();
            implicitAnimations[nameof(Visual.Offset)] = _offsetAnimation;
            _visual.ImplicitAnimations = implicitAnimations;
        }
    }

    private void comboBoxDuration_SelectionChanged(object sender, SelectionChangedEventArgs e) {
        if (_offsetAnimation != null) {
            _offsetAnimation.Duration = TimeSpan.FromMilliseconds(SelectedDuration);
        }
        if (_rotationAnimation != null) {
            _rotationAnimation.Duration = _offsetAnimation.Duration;
        }
    }

    public int SelectedDuration => Convert.ToInt32((comboBoxDuration.SelectedItem as ComboBoxItem).Content);
Result
The result of this all can be seen in the folowing video (GIF) of my demo app. The left Rectangle uses a RepositionThemeTransition, the right one uses an Implicit Animation. The ComboBox can be used to set the duration of the Implicit Animation.
Multiple Animations using an AnimationGroup
I also experimented with a solution in which I would not only animate the position of the Rectangle but also a 360 degree rotation. I had to determine the CenterPoint of the visual, also when it resizes (lines 11-17). I created the rotation animation and added it together with the offset animation to an animation group. This group is assigned to the ImplicitAnimations property of the Visual.
private void InitComposition(FrameworkElement element) {
    if (ApiInformation.IsTypePresent("Windows.UI.Xaml.Hosting.ElementCompositionPreview")) {
        _compositor = ElementCompositionPreview.GetElementVisual(this).Compositor;

        var easing = _compositor.CreateCubicBezierEasingFunction(
                new Vector2(0.3f, 0.3f),
                new Vector2(0.0f, 1.0f)
        );

        _visual = ElementCompositionPreview.GetElementVisual(element);

        // Set CenterPoint to the center, also when resized
        SizeChangedEventHandler fp = (sender, e) =>
            _visual.CenterPoint = new Vector3((float)element.ActualWidth / 2f,
                                                (float)element.ActualHeight / 2f, 0.0f);
        element.SizeChanged += fp;
        fp.Invoke(null, null);

        // Create animation
        _offsetAnimation = _compositor.CreateVector3KeyFrameAnimation();
        _offsetAnimation.Target = nameof(Visual.Offset);
        _offsetAnimation.InsertExpressionKeyFrame(1.0f, "this.FinalValue", easing);
        _offsetAnimation.Duration = TimeSpan.FromMilliseconds(SelectedDuration);

        _rotationAnimation = _compositor.CreateScalarKeyFrameAnimation();
        _rotationAnimation.Target = nameof(Visual.RotationAngleInDegrees);
        _rotationAnimation.InsertKeyFrame(0.0f, 0.0f);
        _rotationAnimation.InsertKeyFrame(1.0f, 360.0f);
        _rotationAnimation.Duration = _offsetAnimation.Duration;

        var animationGroup = _compositor.CreateAnimationGroup();
        animationGroup.Add(_offsetAnimation);
        animationGroup.Add(_rotationAnimation);

        // Set trigger + assign animation
        var implicitAnimations = _compositor.CreateImplicitAnimationCollection();
        implicitAnimations[nameof(Visual.Offset)] = animationGroup;
        _visual.ImplicitAnimations = implicitAnimations;
    }
}
This experiment seems to work OK but I noticed that the rotation also occurs when my page resizes. This because the Offset of the visual changes which triggers the Implicit Animations. I'm not sure if this is something I want.
Closure
Although it works it is not a very simple solution for a small problem. I hope Microsoft will add a Duration property in the near future. I prefer to work declarative.
I have published the updated code on GitHub. I hope you like it.
Fons
All postings/content on this blog are provided "AS IS" with no warranties, and confer no rights. All entries in this blog are my opinion and don't necessarily reflect the opinion of my employer or sponsors. The content on this site is licensed under a Creative Commons Attribution By license.

Blog comments
0 responses