Last week I wrote a blog item about the XAML Animated Headered TextBox Style. I got a lot of reactions on Twitter. Pieter Otten challenged me into adjusting my solution to make it conform the Material Design guidelines. In Android the header (Label) of the TextBox (Text Field) animates on Focus not when you enter a value. I tried to implement this by adjusting my style but that didn't work. I had to introduce an extra behavior to get it to work. See the result in this video.

XAML is very powerful. I have blogged about behaviors a lot. They are great but also have limitations. You can only drag them on Controls, not on Storyboards. To "fix" this I came up with a solution using Attached Properties. The designer support isn't as good with Behaviors but who needs that if we have IntelliSense.
I love C#, XAML and Blend. It is very powerful and lets me create powerful solutions. As a example of it's power I will demonstrate my ScrollSelectedItemIntoViewBehavior. It will let you scroll to a selected item into view of a ListView or GridView without having to write any code.
I have been using Adobe software recently and I noticed you could do simple calculations in textboxes. I used it to export Tile Images in different scale sizes. If the 100% scale of an Image is 150 pixels wide you can enter '150 * 1.5'. It will calculate the width of 225 pixels for the 150% scale size. I loved this feature so I tried to implement it also for my own Xaml apps.
The solution is quite simple. I have created a Behavior called CalculatorBehavior. You just use Blend for Visual Studio to drop it on a TextBox control and you are done.
I use Behaviors in my XAML apps all the time. I have already written a few blog post about this subject. In Silverlight and WPF there was a clear distinction between Actions, Triggers and Behaviors. Triggers are used to invoke an Action. You can use the EventTrigger, StoryBoardCompleteTrigger, KeyTrigger, TimerTrigger, PropertyChangedTrigger, DataTrigger and DataStoreTrigger. And you can easily write your own by using the Trigger 'New Item' template in Blend.
In the Windows 8.1 'Behavior SDK' the Triggers are replaced by Trigger Behaviors. You only get the DataTriggerBehavior and EventTriggerBehavior but you can write your own. With this blog post I will try to explain how to do this. I will use a TimerTriggerBehavior and a SwipeTriggerBehavior which you can use to execute actions when you active a swipe gesture on a UIElement.
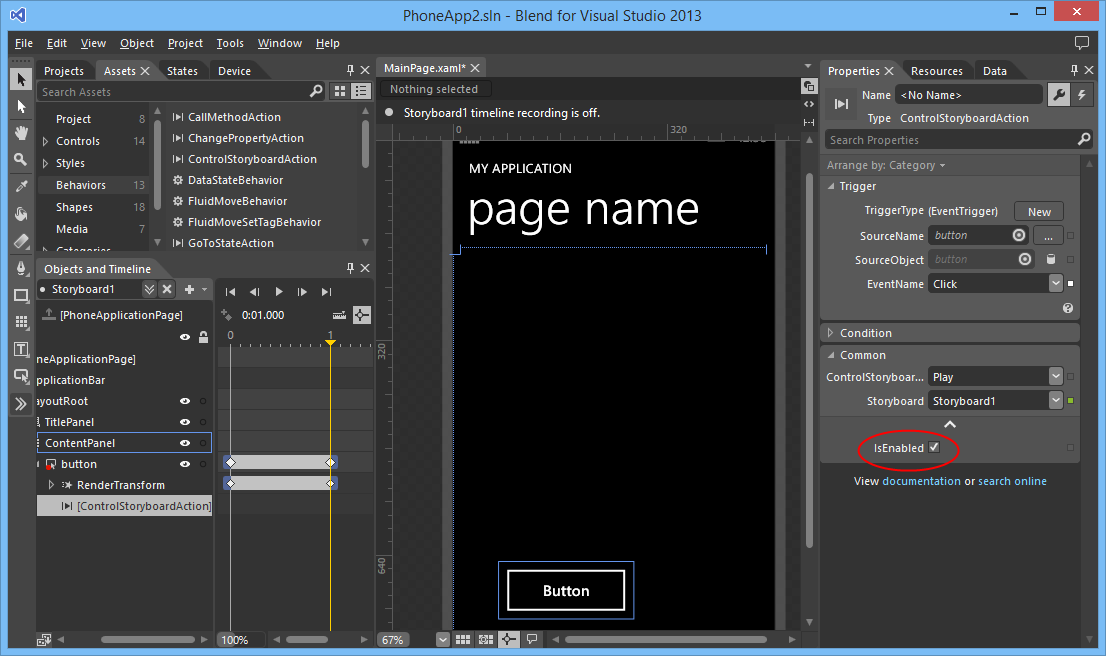
A few weeks ago I have written a blog post about how you can write your own Behaviors and Actions for Windows 8.1. I noticed that the Windows 8.1 Actions are not compatible with the Silverlight and Windows Phone Actions. Those actions have a IsEnabled property.
The Windows 8.1 Actions don't have an IsEnabled property.
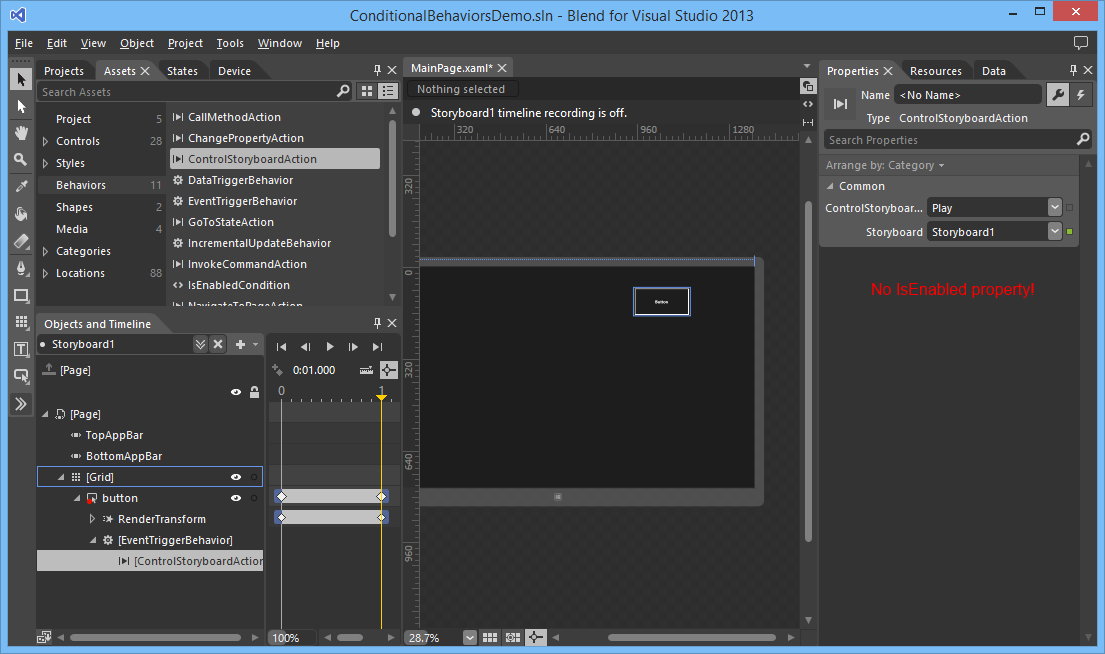
Luckily I got a tip from the Microsoft XAML Tools team. A new feature that is added to the Behaviors SDK is that Actions can return results as well as have its own ActionLists. This helps in relaying execution results or building conditional behaviors.
The new version of Blend for Visual Studio 2013 RC now supports Behaviors. I have used Behaviors for developing Silverlight and Windows Phone applications a lot. Now you can use them for you Windows Store XAML apps too. Two type of Behaviors are supported: Behaviors and Actions. Triggers are "dropped" and can/should now be implemented using Behaviors.
There are 7 build-in Actions: CallMethodAction, ChangePropertyAction, ControlStoryboardAction, GoToStateAction, InvokeCommandAction, NavigateToPageAction and PlaySoundAction. Many were already available in Silverlight. The NavigateToPageAction is new.
There are 3 build-in Behaviors: DataTriggerBehavior, EventTriggerBehavior and IncrementalUpdateBehavior.
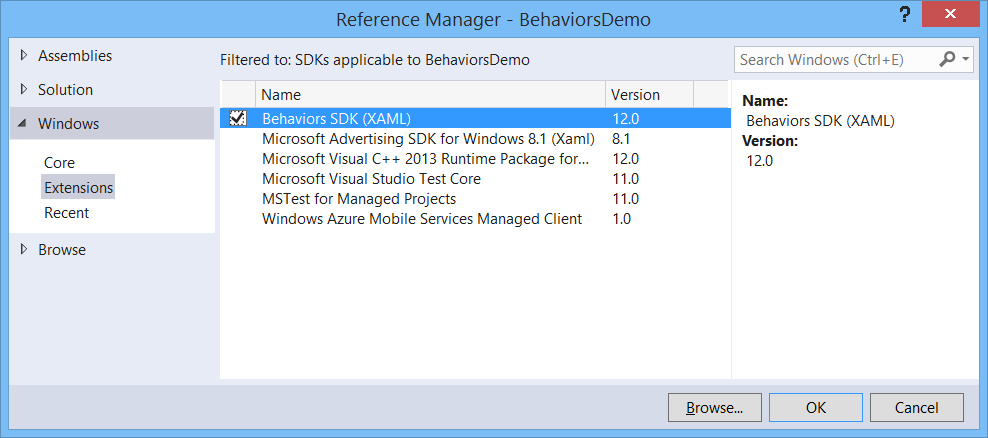
You can create your own Actions and Behaviors. Before you can do that you must add a reference to the 'Behaviors SDK'.
Silverlight doesn't support keyboard selection on a ListBox or Combox. I have created a small Behavior which fixes this problem. You can attach the KeyboardSelectionBehavior to a ListBox or ComboBox using Microsoft Expression Blend. You drag it from the Assets and drop it on your ComboBox or ListBox. If you have a custom ItemTemplate you will have to set the SelectionMemberPath property.
Try my behavior below. If you press a key on the ComboBox or ListBoxes it will select the next item starting with the given key.
The ComboBox in this example is not databound, The behavior uses the Convert.ToString() method to convert the Content of each ListBoxItem/ComboBoxItem to a string. An invariant case insensitive StartWith() comparison is used to find the next item.
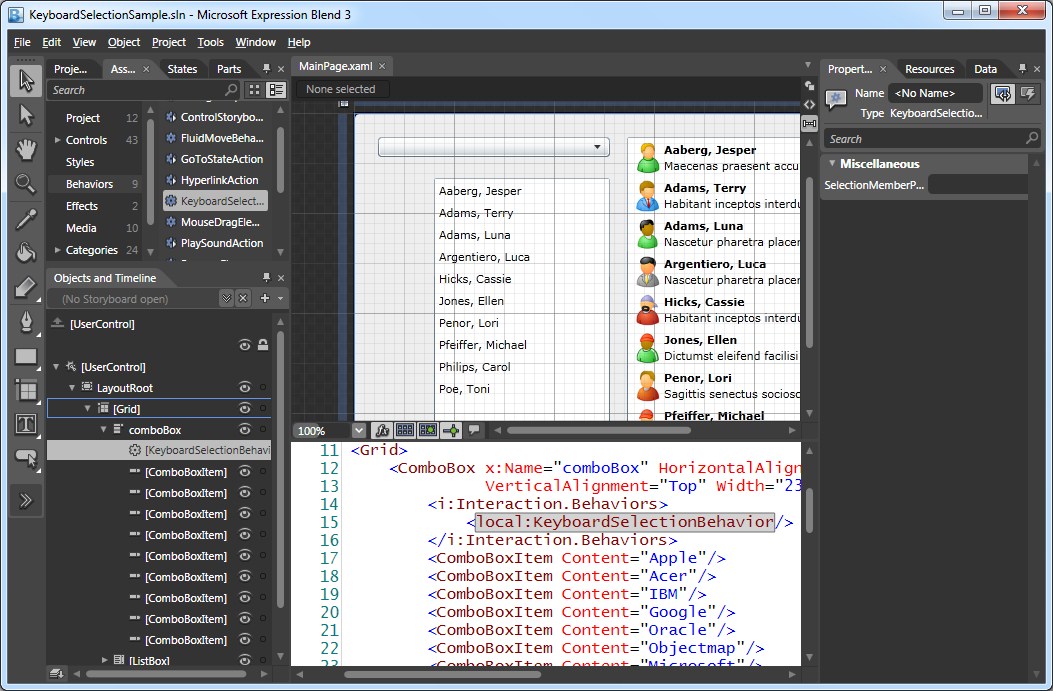
The left ListBox is databound to SampleData containing Employees. The behavior uses the DisplayMemberPath of the ListBox. The Name of the databound Employee is used for keyboard selection.
A few months ago I wrote an blog post about a Silverlight 3.0 LetItSnowBehavior. This Behavior can be used to add a Snow effect to a Canvas. Very usefull if you want to create a christmas card.
This behavior was always showing you falling snow flakes. You couldn't stop and (re)start the gameloop. The best way to implement this is by adding Commands to the behavior. This allows you to select one or more triggers to Start or Stop the gameloop. I have added the Start and Stop properties of the type ICommand to the LetItSnowBehavior class. In the constructor I have initialized these properties with new ActionCommand objects (Microsoft.Expression.Interactions.dll) and delegates to the OnStop() and OnStart() methods. Triggers attached to these commands will execute the these methods.
Controlling a MediaElement in Silverlight isn't difficult. You use the Play(), Stop() and Pause() methods in your code. I have written the 'ControlMediaElementAction' Behavior which makes it even easier. You don't have to write a single line of code. The ControlMediaElementAction is associated with a MediaElement. It has a ControlMediaElementOption which you can set to Play, Stop, Pause and RewindAndPlay. The Invoke() methods controls (Plays, Stops, Pauses and RewindAndPlays) the AssociatedObject (MediaElement).
public
class
ControlMediaElementAction : TriggerAction<MediaElement> {
protectedoverridevoid Invoke(object o) {
switch (ControlMediaElementOption) {
caseControlMediaElementOption.Play:
this.AssociatedObject.Play();
break;
caseControlMediaElementOption.Stop:
this.AssociatedObject.Stop();
break;
caseControlMediaElementOption.Pause:
this.AssociatedObject.Pause();
break;
caseControlMediaElementOption.RewindAndPlay:
this.AssociatedObject.Position = TimeSpan.Zero;
this.AssociatedObject.Play();
break;
default:
break;
}
}
publicControlMediaElementOption ControlMediaElementOption { get; set; }
}
public
enum
ControlMediaElementOption {
Play, Stop, Pause, RewindAndPlay
}
You assign a ControlMediaElementAction to a MediaElement. In Expression Blend you drag it from you Asset tab and drop it on a MediaElement. Then you can select your trigger and set all other properties from the Properties tab.
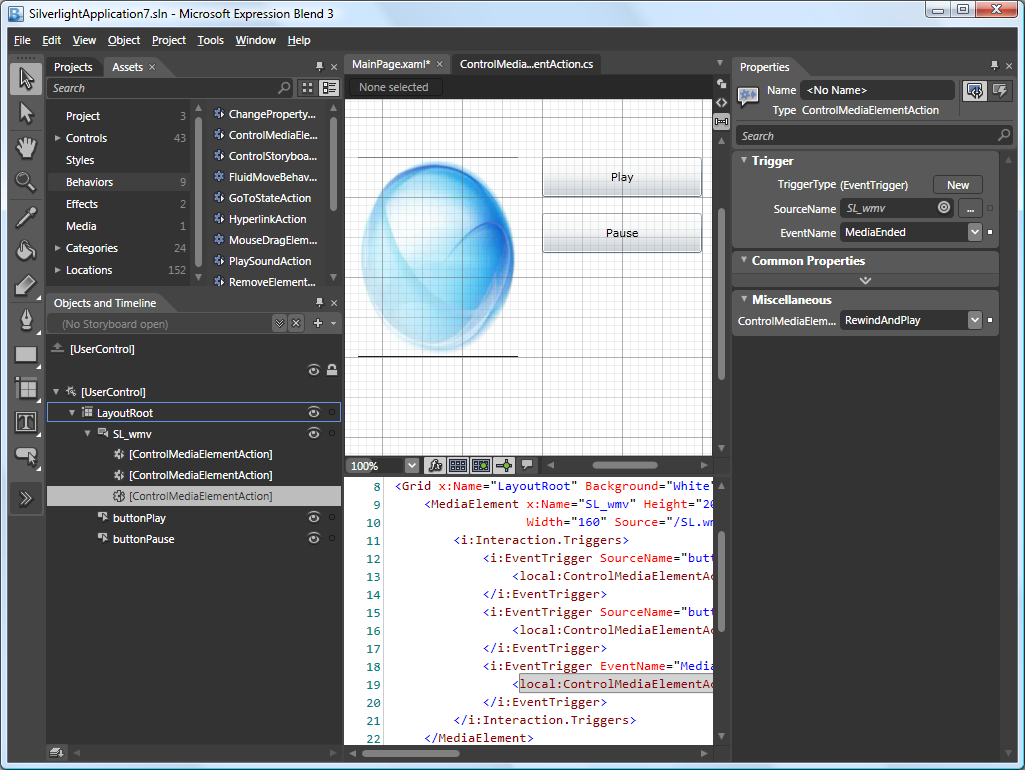
In the following example I have 3 ControlMediaElementAction assigned to a MediaElement. The first is triggerd by the 'Click' event of 'buttonPlay' and uses the 'Play' option. The second is triggerd by the 'Click' event of 'buttonPause' and uses the 'Pause' option. The third is triggerd by the 'MediaEnded' event of the MediaElement and uses the 'RewindAndPlay' option, making the movie loop.


